Using AWS Codebuild with Yarn and Chrome
I am a big fan of using CI / CD. As most software engineers are. That’s not a very controversial stance.
For open source projects there are some really nice services out there. One such service is Travis CI. I really like their service for open source projects, but I have a few side projects that I don’t want to open source.
My side projects are not for monetary gain so there is no revenue from them. They aren’t going to be businesses or anything like that, but I also have no desire to open source them. When I went to look at using Travis CI for these type of projects, the pricing model is, well, way too pricy - $69 USD per month… per month. My entire Amazon infrastructure bill isn’t that much.
So when I wanted to put Mesh into a pipeline, I was about to spin up a docker container with my old friend Teamcity.
But then I thought, wait a minute, Amazon has everything. They must have some kind of build server service by now. They do. It’s called CodeBuild.
Mesh is built in Typescript, uses Yarn for package management, and uses Chrome Headless to run tests. I couldn’t find a nice example of how to set this up online, so here is how I did it.
Setup The Build Job
The first part is almost too easy for me to go over. Just log into AWS console and search for CodeBuild, click on Create Build and fill in the one page form. Here are a few possible gotchas on this form:
-
I am using GitHub, but there are connectors for GitHub and BitBucket. Check the Webhook checkbox to have the repo kick off whenever anything is pushed to your repository. Warning this will build when you push to any branch - there is no way to limit it to just one.
-
For the OS, choose Ubuntu, and use the buildspec.yml in your root directory.
-
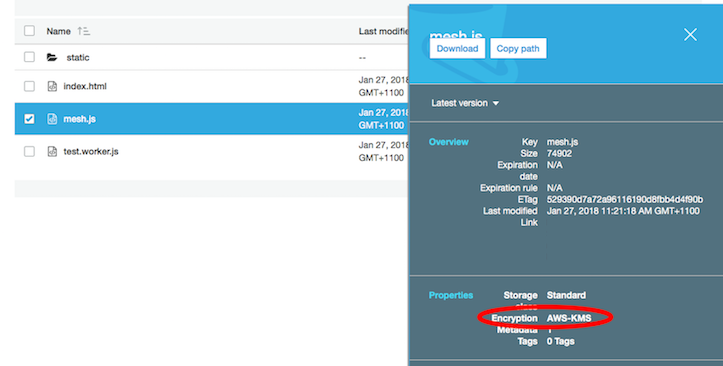
If you’re going to put the output artifacts into S3, make sure your bucket is in the same region as the CodeBuild job. Warning: the artifacts will be encrypted on S3 and will not be available to the public directly.

Karma Config
To get headless chrome to run properly, I had to add the following to my karam.config.js
...
  customLaunchers: {
    ChromeHeadless: {
      base: 'Chrome',
      flags: [
          '--headless',
          '--disable-gpu',
          '--remote-debugging-port=9222',
          '--no-sandbox',
      ],
   }
...
The –headless_ and –no-sandbox parameter being the most important.
And my test command in the package.json file (the scripts -> test section):
...
  "test": "NODE_ENV=test karma start --log-level debug --browsers ChromeHeadless --single-run --reporters=spec",
...
The buildspec.yml
In the end you’ll probably wind up wanting to make your own docker container for the build as the setup for this is kind of over the top. Doing these steps on every build isn’t ideal, but should get you started, and for smaller projects it might be Good Enough™.
Here is my buildspec for the Mesh project:
version: 0.2

env:
  variables:
    CHROME_BIN: "/usr/bin/chromium-browser"

phases:
  install:
    commands:
      - echo Entered the install phase...
      - apt-get update -y
      - apt-get install apt-transport-https
      # Setup for Yarn
      - curl -sS https://dl.yarnpkg.com/debian/pubkey.gpg | apt-key add -
      - echo "deb https://dl.yarnpkg.com/debian/ stable main" | tee /etc/apt/sources.list.d/yarn.list
      # Setup for Chrome
      - apt-get install -y software-properties-common
      - add-apt-repository -y ppa:canonical-chromium-builds/stage
      # Do it!
      - apt-get update -y
      - apt-get install -y chromium-browser
      - apt-get install -y yarn
  pre_build:
    commands:
      - echo Entered the pre_build phase...
      - yarn install
  build:
    commands:
      - echo Entered the build phase...
	  - yarn run lint
      - yarn run test
      - yarn run build
  post_build:
    commands:
      - echo Entered the post_build phase...
      - cp index.html dist/index.html
      - cp -R static dist/static
      - echo Build completed on `date`
artifacts:
  files:
    - '**/*'
  discard-paths: no
  base-directory: dist
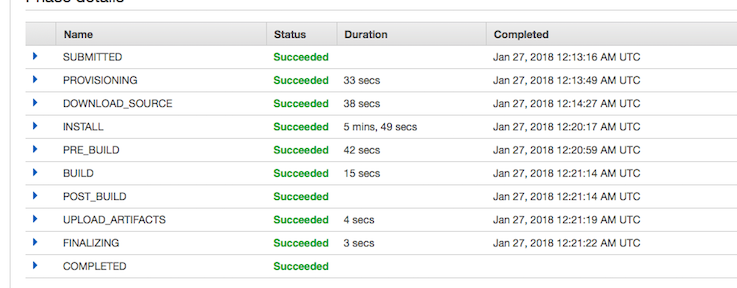
As you can see, the install command does quite a bit of work. This will run every build. This step alone takes about 6 minutes on every build (Which is why you’re probably better off building a docker container with yarn and chrome already in there).
After that it should be pretty obvious what it’s doing.
You even get a cool embed-able badge like all the cool kids:
Here is an example run:

