Saving a Customised Linux Amazon Instance (EC2 and S3)
In my last post about playing around with EC2, I showed signing up for Amazon’s service and using Firefox’s Elasticfox to bring up AMIs. This bit is about how to take that running instance and save it to S3.
The workflow being, you bring up an AMI, install a bunch of software, configure it how you need it, and then you need to store your new image so you can bring it up again and again (since images will revert back to their saved state after shutdown).
Saving a custom AMI isn’t too difficult once you know how, but it takes a bit of digging around to find out how all the pieces work. I am going to assume you have an EC2 and S3 account already, know how to bring up an EC2 instance, have your Amazon API Tools installed on your Mac or Linux desktop, have your private and cert key’s installed, and have your aws access key id, aws secret access key, and Amazon account number handy (the account number is under your name on the Amazon account page. It looks like XXXX-XXXX-XXXX).
The key concept that had me stumped for a bit is you have to do things on both your local desktop and on the AMI base server as it’s running.
Find a base image
In Elasticfox find an image you want to use as a base. I grabbed an Ubuntu 8.04 instance, but any Linux instance should work with little modification to this walkthrough. Once you find a suitable instance, Launch an instance of the AMI.
Connect to the instance
SSH into the box either by the Elasticfox right click “Connect to Public DNS Name”, or by hand. Make sure the connection works and it looks like a nice starting point for your image.
Copy your keys
If the box looks ok, you’ll need to copy your private key and cert key over to the instance. This is so Amazon knows it’s yours and allows Amazon to start the instance. It is very important to copy the keys into the /mnt directory because that directory will not be saved with your new image. If you put the keys somewhere else, they might get saved and the next person that starts up your AMI will have your keys… not good.
You can copy the keys to the running instance with the following command (replacing values where apropos)
$ scp -i /Users/robrohan/ec2-keys/id_my_rsa_key ~/.ec2/pk-STRINGOFTHIRTYTWOLETTERSORDIGITS.pem ~/.ec2/cert-STRINGOFTHIRTYTWOLETTERSORDIGITS.pem root@[your_instance_public_address]:/mntInstall tools on the AMI
Now switch back to the SSH window that you have connected to the AMI. We need to install a few Amazon tools on the instance to allow you to create another AMI and store it. Depending on what base you installed you might need to install other tools. For example, I had to install the following:
$ apt-get install zip unzip ruby openssl libopenssl-ruby curlYou’ll know in a second if you are missing something else.
Download the Amazon AMI tools onto the server.
$ curl http://s3.amazonaws.com/ec2-downloads/ec2-ami-tools.zip > ec2-ami-tools.zipNow you need to unzip the tools and put them somewhere. You may have a specific way you like to do it, but this is how I did it command by command (sorry there is no explanation here, but you should be able to follow this)
$ cd
$ curl http://s3.amazonaws.com/ec2-downloads/ec2-ami-tools.zip > ec2-ami-tools.zip
$ mkdir ec2
$ cp ec2-ami-tools.zip ec2
$ cd ec2
$ unzip ec2-ami-tools.zip
$ ln -s ec2-ami-tools-* current
$ vi ~/.bashrc
add the following lines to the end of the .bashrc file
export EC2_AMITOOL_HOME=~/ec2/current
export PATH=${PATH}:~/ec2/current/bin
And then re-initialize the configuration file
$ source ~/.bashrcYou should be able to run the following command and not get an error:
$ ec2-bundle-vol --helpCreate your AMI
Now we are going to take a snap shot of the running server. While still on the server run the following command:
$ ec2-bundle-vol -d /mnt -k /mnt/pk-STRINGOFTHIRTYTWOLETTERSORDIGITS.pem -c /mnt/cert-STRINGOFTHIRTYTWOLETTERSORDIGITS.pem -u XXXXXXXXXXXXWhere XXXXXXXXXXXX is your Amazon account number without the dashes.
This command will take a while to run, and it takes longer the larger the instance - go make a cup of coffee and relax for a bit.
Once it’s done make sure there are no errors. The first time I built one I had an error (something about the loopback interface being horked). I continued on only to find I couldn’t connect to the instance (which saved, and started ok).
One error you might get that seems to be ok is “Unable to read instance meta-data for product-codes”. I am guessing that has something to to with proprietary OSs.
Save your new AMI to S3
You now have an AMI of your very own, but we need to save it to S3 so you can shut down your current AMI and start up your new one.
While still SSH’ed into the server using the following command to send your AMI to your S3 account:
$ ec2-upload-bundle -b [your-s3-bucket] -m /mnt/image.manifest.xml -a [aws-access-key-id] -s [aws-secret-access-key]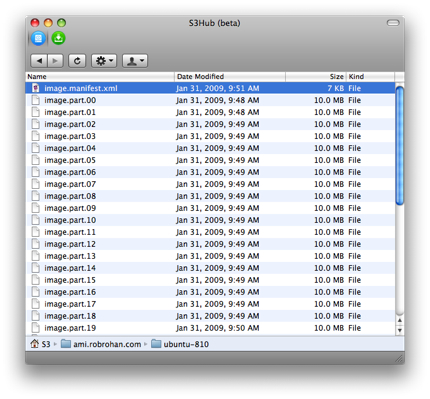
It’s better to create a bucket before you issue this command. You can use any standard S3 desktop tool. If the bucket doesn’t exist, it should create the bucket for you though. The keys are those crazy long keys you use to access S3.
Register the AMI
Ok, almost done. You’ve now created an AMI and stored it on S3, but you still have to tell EC2 where the AMI is located so you can create an instance of it.
Go back to your desktop, and issue the command:
$ ec2-register [your_bucket]/image.manifest.xmlThe command should respond with an AMI ID like ami-259d7a4c. You’ll use this key to start up an instance of your AMI.
Start up your AMI
If you go back into Elasticfox and hit the refresh button on the Machine Images area, you can then type in your new AMI in the search box, hit enter and see your image. At that point you can right click and do “Launch instance of this AMI”… the rest should be old hat.
You’re not done yet…
So you went through that, now you probably have to do it again this time setting up all the software and configurations you want. If you’re going to trash that instance we just built (or any future versions), you need to de-register the AMI before you remove the files from S3. It’s very easy, you just:
$ ec2-deregister [ami id]The command should just echo back the ami-id. You can then delete the files off S3 using whatever tool suits you best.
So yeah, quite a bit of steps. But most make sense, and once you do it a few times it’s not too bad. But it was hard enough that I made this quick reminder for myself.